Club Activity Report for Robotics Club 26 th August 2023
Today, scientific and technological inventions have affected every aspect of human life. At Vikhe Patil Memorial School, Pune we inspire the young minds to be the driving force in the field of robotics. The Robotics Club hence helps the students to inculcate within themselves the
habit of thinking technologically.
Name of activities:
Level 1: a) Hydraulic Brake and Hand steadiness game /tester
Level 2: a) Mini Grinder machine and JCB Hydraulic Arm (only explained)
Level 3:a) Arduino based LED blinking/sequence (individual take home)
Objective of the activity
Level 1: a) Students will be able to make Hydraulic Brake and Hand steadiness game /tester
Level 2: a) Students will be making a JCB arm based on the principle of hydraulics .
b) Students will be able to make Mini Grinder machine.
Level 3: a) Students will be able to make LED blinking /sequence based on Arduino Procedure:
Level 1: Hydraulic Brake And Hand Steadiness Game:
– Students fix the two foam pillars by inserting nails from the bottom.
– They fixed the motor as shown in the manual.
– The connected the motor wires to the battery cap with switch in between.
– Students made the hand steadiness game using the material provided.
– Students followed the instructions given in the manual.
# Material used: Hydraulic Brake-Flexi tube, 5ml syringes , battery cap, toy motor, 9V battery, CD, switch, Foam pieces and nails .
Hand Steadiness Game- battery cap, nails, simple wire, copper wire, 9V battery, key made with
copper wire, foam rubber, buzzer.
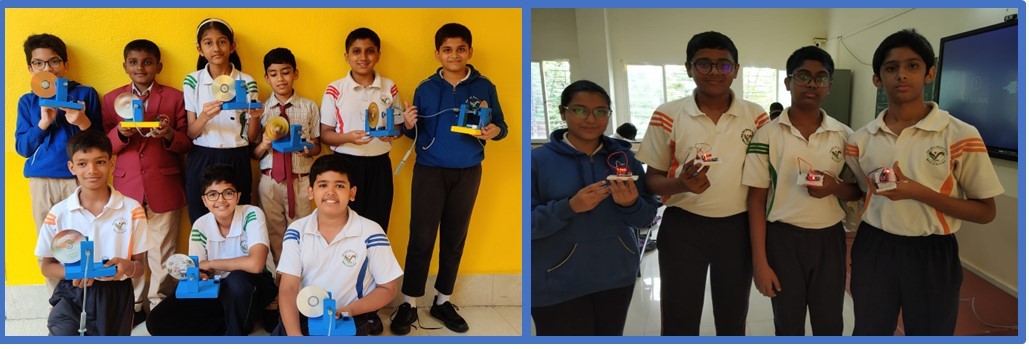
Level 2: Mini Grinder machine and JCB hydraulic arm.
– Students learnt to make simple circuit.
– Students fixed the sand paper strip over the edge of the cap with two way tape.
– Students made a hole at the center of the cap and fixed it to the shaft.
– Students constructed a JCB arm.
– They learnt the use of principle of Hydraulics
# Material used: Mini Grinder – two way tape, 9V battery cap, bottle cap, sand paper strip, PVC pipe, DC toy motor, on /off switch.
JCB Hydraulic arm – 5/6ml syringes , nails, two way tape, metal, wire, IV tubes, foam pieces.
Level 3: Arduino based LED blinking/sequence .
– The Arduino programming language was explained.
– Students have to install the Arduino software in their computer .
– Then install CH$341 drivers.
– Students have to open a new file in the Arduino software and then write down the code given in the manual.
– Students connected Arduino board to the computer using the cable.
– Students make the connections as shown using the jumper wires on the breadboard.
#Material used: USB cable, reset button, wires, , mini USB,LED’s, ICSP pins and Analog input pins.
Report of the sessions:
Level 1: Hydraulic Brake And Hand Steadiness Game:
– Students made the hydraulic brake .
– Students learnt the making of a wireless circuit.
– They learnt the use of conducting materials in times of emergency.
– Students understood that when the key comes in contact with the wire the circuit
gets completed and the buzzer starts making sound.
– The whole procedure depends on the concentration and the steadiness of our hands.
Level 2: Mini Grinder machine and JCB hydraulic arm;
– Students learnt the basics of electric circuit.
– Students understood the use of the light sensor LDR
– Students connected the battery to the circuit.
– Circuit was made using DC motor, switch and 9Volts battery
Level 3: Arduino based LED blinking/sequence;
– Students learnt to build the circuit using Arduino programing
– Students learnt the importance of IDE.
– They connected the 9V battery to the arduino board to power up the LED lights
The students enjoyed doing all the activities. These activities will surely help our students to apply their knowledge creatively in future.
Ms. Geetanjali Pardeshi
Ms. Pratiksha Sadafule